
by Joe Parlanti
One thing that you’ll get to do a lot during a nut and bolt restoration is paint parts. Traditionally, we clean, wire brush, or sandblast the parts, followed by primer, and final color paint application. Powder Coating is an interesting alternative to painting that is now available to the amateur. So what exactly is powder coating? Basically, it’s a process whereby paint, in powder form, is applied electrostatically to a part which is then baked to cure the finish. The advantages over conventional paint systems are numerous. The most common attribute talked about is the toughness of the finish itself. It’s extremely chip resistant, and also highly tolerant of heat. Another nice characteristic is cleanup. Basically, you just sweep up what as fallen to the ground. Finally, it can be very economical because there is so little paint lost during applications.
The Equipment
Powder coating has been around for quite some time but it really wasn’t until Eastwood marketed a system tailored for the hobbyist that it became a viable alternative to paint. Since then others like Harbor Freight have started selling systems but I have no experience with them. The Eastwood system consists of several components as shown here (click on pictures for a larger view):

The gun is similar to a traditional paint gun (in fact it looks to have been made by modifying one). The main difference is a nylon barrel with 3 small diameter nylon tubes arranged around a wire electrode on the inside. There is a connection for compressed air onto which a filter is fitted. A high voltage – low current power supply produces the current. Finally, there is a positive electrode which is clipped to the part, along with a thumb switch to activate the power supply.
 The equipment needed for the curing process can be as simple as an old kitchen oven (I bought one for $25) or the more exotic infrared heaters which start at around $500 and go north from there. Unless you have one of these, you’ll be restricted to parts that will fit in the oven.
I took out the racks and made a bunch of removable hooks that parts can be hung from. The racks can be used for things like wheels that you can powder coat while on the rack and then place in the oven.
The Powders
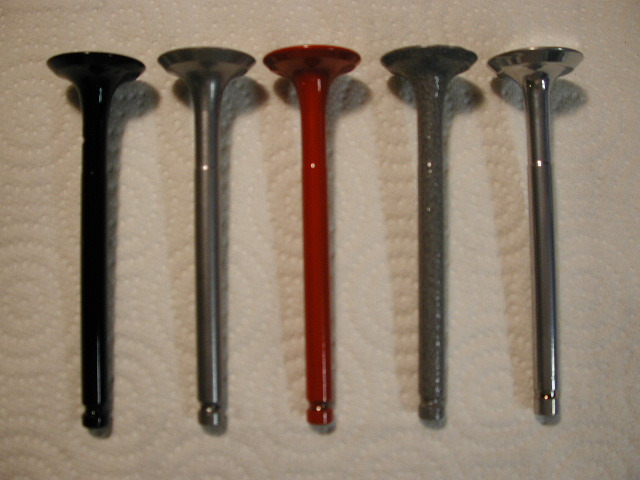
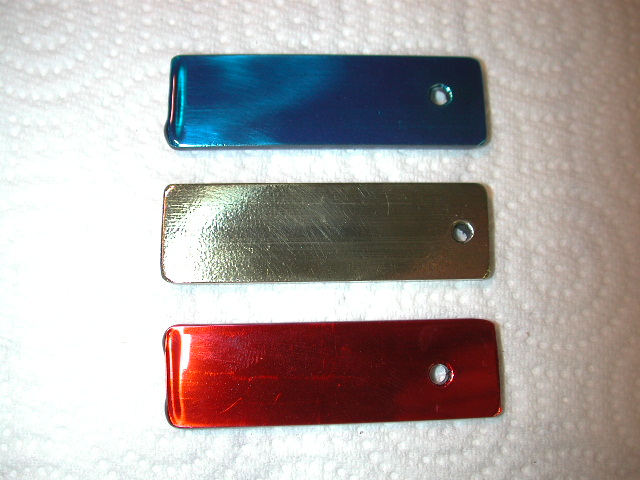
Eastwood sells over 100 different types / colors of powder. There are standard colors which include flat to gloss finishes of basic colors, clears, several manufacturer colors like Chevy orange, Ford blue (dark and light), John Deere green, and various metal types like cast iron, sandblasted aluminum, bronze, etc. The specialty colors include some mirrored finishes, metallics, transluscents, wrinkle finishes, iridescent finishes, and high-temp powders.

Most of the powders cost between $9 and $20 for an 8 oz. bottle. While Eastwood has a great selection, I’ve found a good way to get the powder much more inexpensively is to get to know your local commercial powder coat guy. When I had my front cross member done, I was able to talk him into selling me bulk powder at a much lower price. It’s been a few years but I think I was able to get 5 lbs for around $10, compared to Eastwood’s $50. The stuff goes a long way, so you may be happy just buying it from Eastwood. Storage is no big deal, just keep it out of the humidity.
The Process
The powder coating process can be applied to any material through which a current can be passed, and can withstand a curing temperature of 400 deg. F. Parts must be bare metal, clean, oil and silicone free. I normally use 3 methods for prepping the parts; wire brushing, chemical stripping, or sandblasting. If you’re going to do a lot of this type of thing, an investment in a tabletop sandblasting cabinet is well advised.
Once the parts are down to bare metal, you’ll need to wipe them down with a degreaser of some sort. I’ve used commercial degreaser / dewaxers, but have switched to acetone which seems to work just fine. Simply wipe down the parts and try not to touch them with your bare hands afterwards.

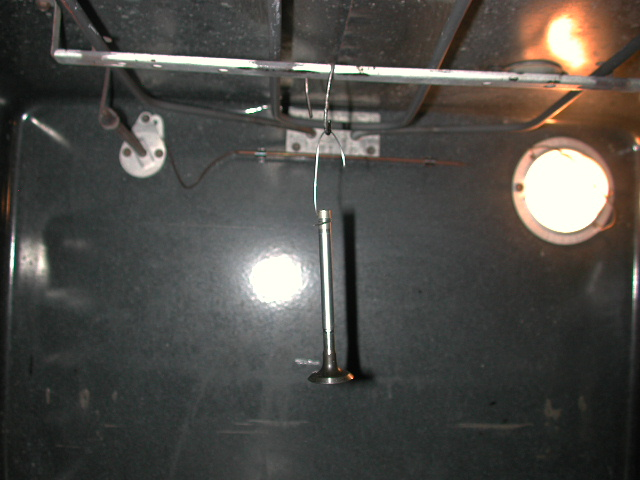
Next you’ll need to attach some safety wire to the part to provide a path for the current to flow to the part, and for hanging it in the oven during the curing process. Here’s a photo of one of the valves ready for coating.
There may be a need to mask off some areas that you don’t want to coat and you’ll need to use materials that can handle the heat. I found some high temperature masking tape that works just fine. Eastwood sells it also, but it’s $13 / roll. For covering large areas, aluminum foil can be used with the high temp tape.

Now that you’re ready to begin coating the part you’ll need to supply air to the gun. 10 – 15 psi is all that’s needed to get the powder out of the gun. What you’re aiming for, is a nice dust cloud that will envelope the area. Any higher pressure tends to actually blow the already deposited powder off of the part, and wastes powder.
Next, clip the positive lead onto the safety wire. When you’re ready to begin coating, depress the thumbswitch and pull the trigger. There’s not much to it after this except for learning how much powder to apply.
When you’re finished, be sure to touch the tip of the gun to the safety wire without depressing the thumbswitch. This effectively discharges everything and will save you a nice surprise when you grab the part.
Carry the part over to the oven and hang inside being careful not to disturb the powder
Your oven should be set to between 375 deg. and 400 deg. F. Some powders will actually suggest a cure temperature but I normally use 400 deg. The only problems I’ve experienced is some blistering of the full gloss clear at 400 deg. The part should be left in the oven for a minimum of 10 minutes after flow out. Sheet metals parts go quick, large, heavy castings, take a while.
After the requisite period of time, take the parts out of the oven and hang them somewhere to dry, oops I meant to say, cool … At this point the curing process is complete and you’re ready to install the part.
Here are a couple of projects that have been powder coated. This is a finished wheel from my 1966 Sunbeam Tiger. It was a 3 step process after cleaning and polishing; the inside and back were done in silver, followed by extensive masking and coating the inner areas with an anthracite metallic powder, finishing with a gloss clear over the entire wheel:

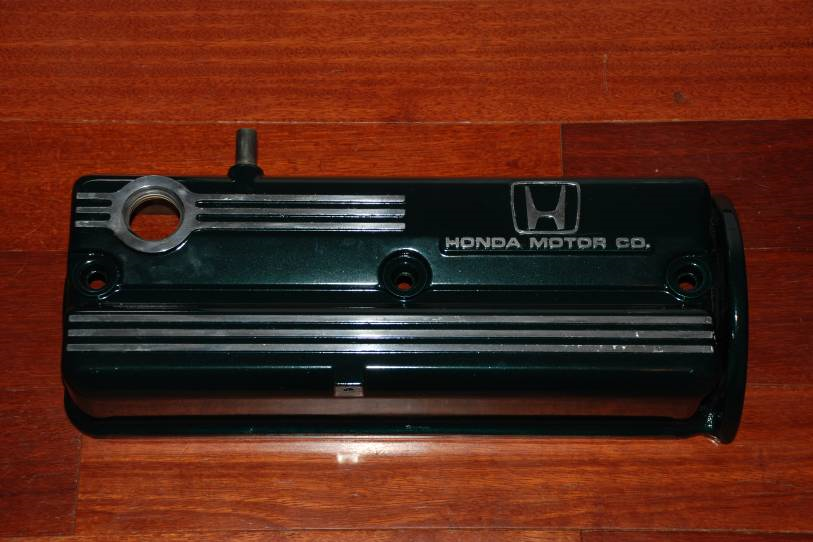
Here’s a valve cover I did recently. Lots of tedious masking!
This is my latest result. It’s a 1969 Honda CT70 that I restored. The candy finish was achieved by first coating the parts with a color called silver metallic sand, followed by a translucent blue. The big challenge here was to get the entire frame in the oven at one time. To accomplish this, I constructed an insulated, 4-sided “tent” that would slide on the open oven door. It worked like a charm!

Conclusion
Powder coating is an interesting process that is easily accomplished by the amateur restorer. If it seems like something you’d like to do, go find a cheap, used oven, buy the kit, and start “Coating” I guarantee you’ll be pleased with the results.
Comments (1)
Thanks for sharing this article. I feel Powder coating is the best for a long-lasting effect. Powder coating provides the best and nice finishing look to the metal and steel compare to other coatings and paint. Keep sharing such great informative article.