by Joe Parlanti originally posted on tigersunited.com
If your Tiger’s seats looked anything like mine, a full restoration is in the cards. There are basically 2 choices; pay an upholstery shop a lot of money, or do it yourself. I’ve always been the type to learn new things whenever I can, especially if it will save money, so here goes. The primary reason for writing this article is that when I received all of the parts for the seats from Rick at Sunbeam Specialties, I was at a loss as to the proper procedure. I checked around and finally ended-up calling Martha Wheat of Pro Prep Interiors. If you’ve never heard of Martha, she’s the person who has made most of the interior kits sold by the various Sunbeam suppliers for many years. Martha also reupholsters seats.
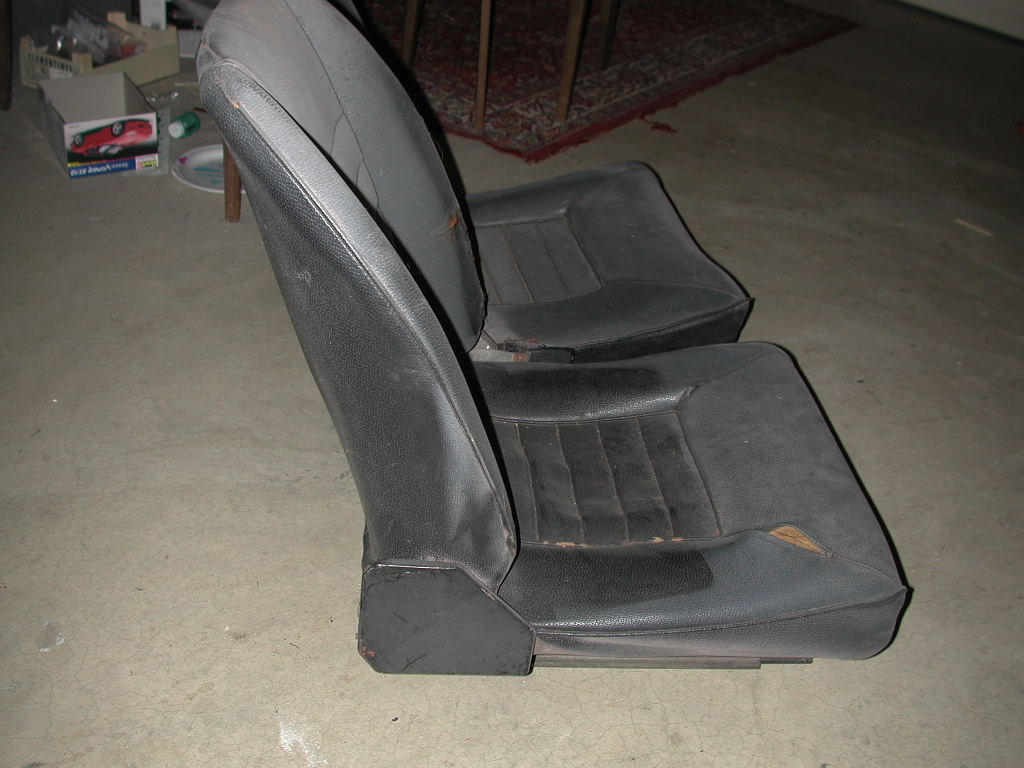
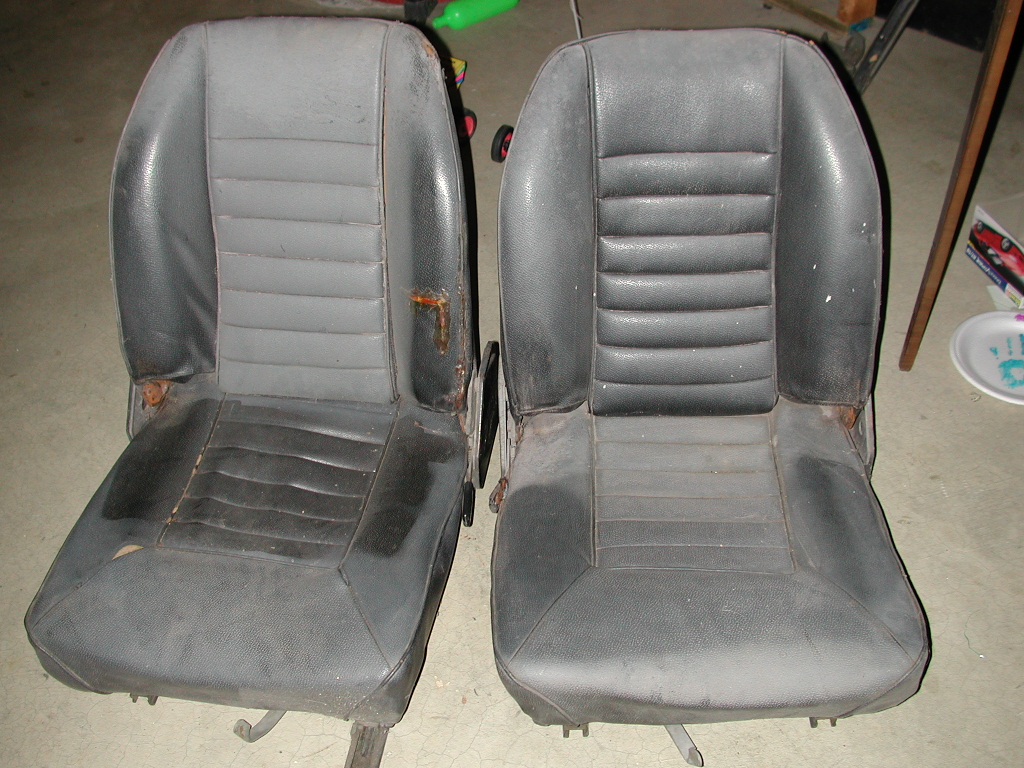
Before
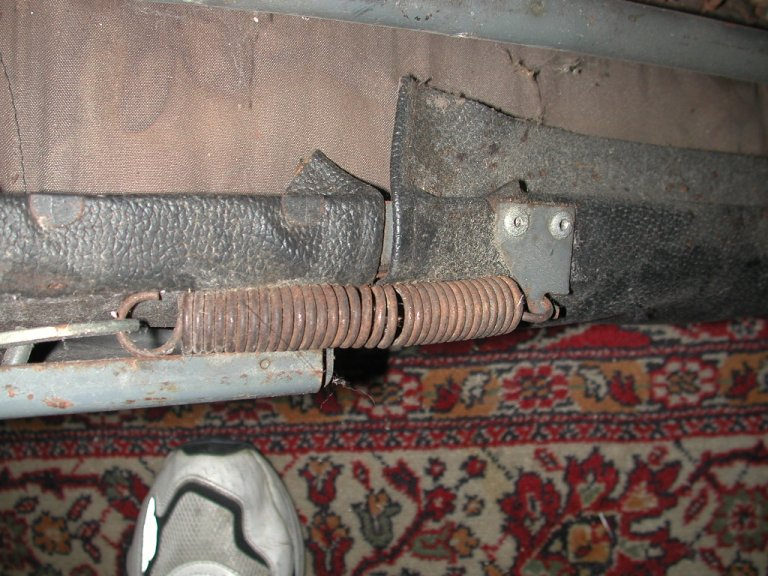
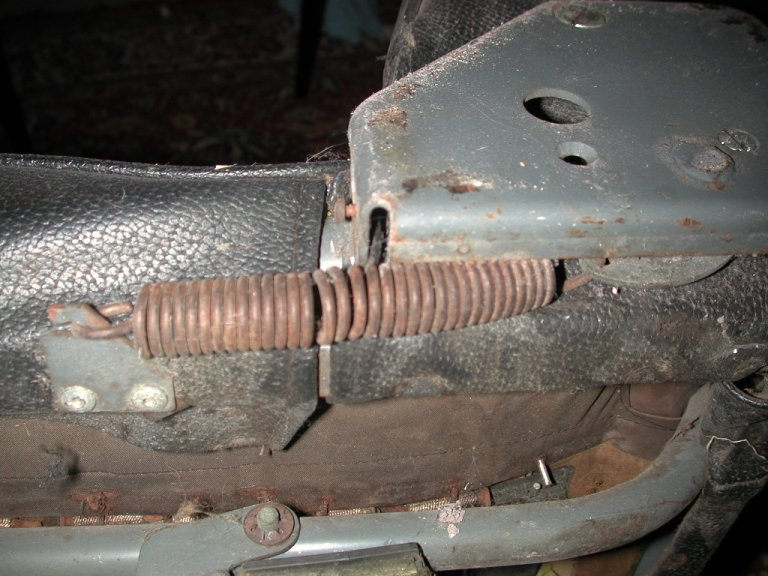
While the vinyl on my seats was not too bad, virtually all of the other soft parts were a mess. Here are a few of the “before” shots (click on the pictures for a larger view):


My favorite discovery was the homemade seat straps that appear to be constructed by hand sewing fabric straps to rubber tubing which also captured a sawed-off nail around which music wire was wrapped in place of seat hooks. Must have taken forever just to save a couple of dollars by not buying the inexpensive strap kit.
Disassembly
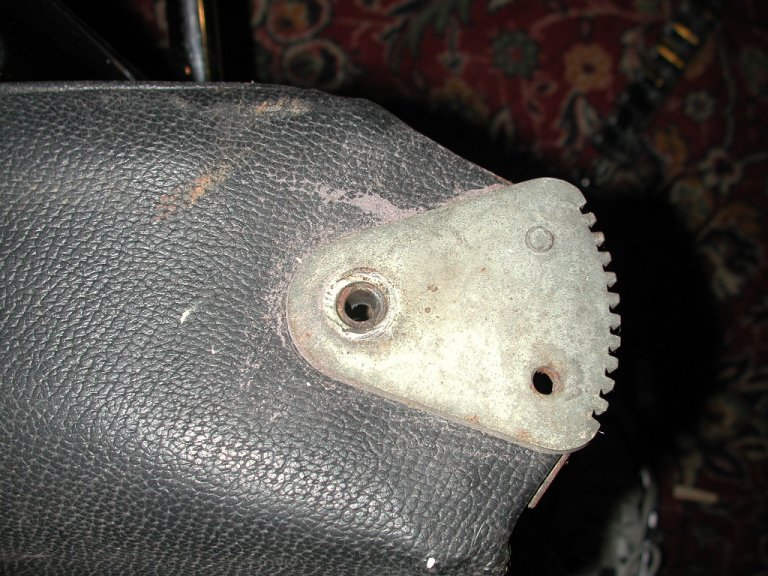
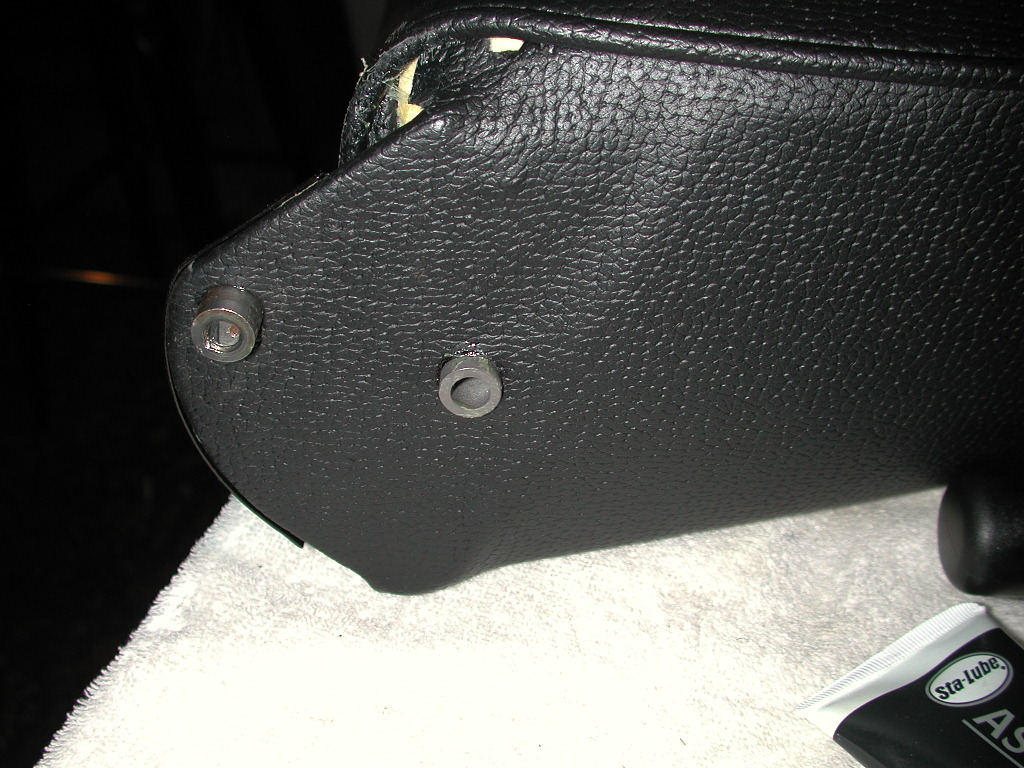
The first step is to remove the seat slider mechanism. Separate the seat bottom from the back by removing the large flat head screws. Be careful as these are easy to break or to round out the slots. An impact driver may be required to get them loose. At this point remove all of the brackets, springs, and hardware from the seat halves keeping track of where everything goes. I find that taking digital photos during the disassembly can save a lot of guesswork during the reassembly process. Here are a few shots that may help:


After all of the hardware has been removed you can start stripping the old vinyl covers, foam, etc. from the frames.
Seat Bottoms
The covers are held on with 24 clips which can be pried off with a sharp bladed screwdriver. Next, remove the foam cushion which, depending on condition, may range from a single piece, to a pile of foam dust. Finally, remove the canvas strap supports by drilling out the rivets holding the steel straps to the frame. For the seat bottom, there will be a total of 6 steel straps, 4 to hold the 2 canvas pieces to the frame, and 2 to provide a place to hook in the rubber straps.
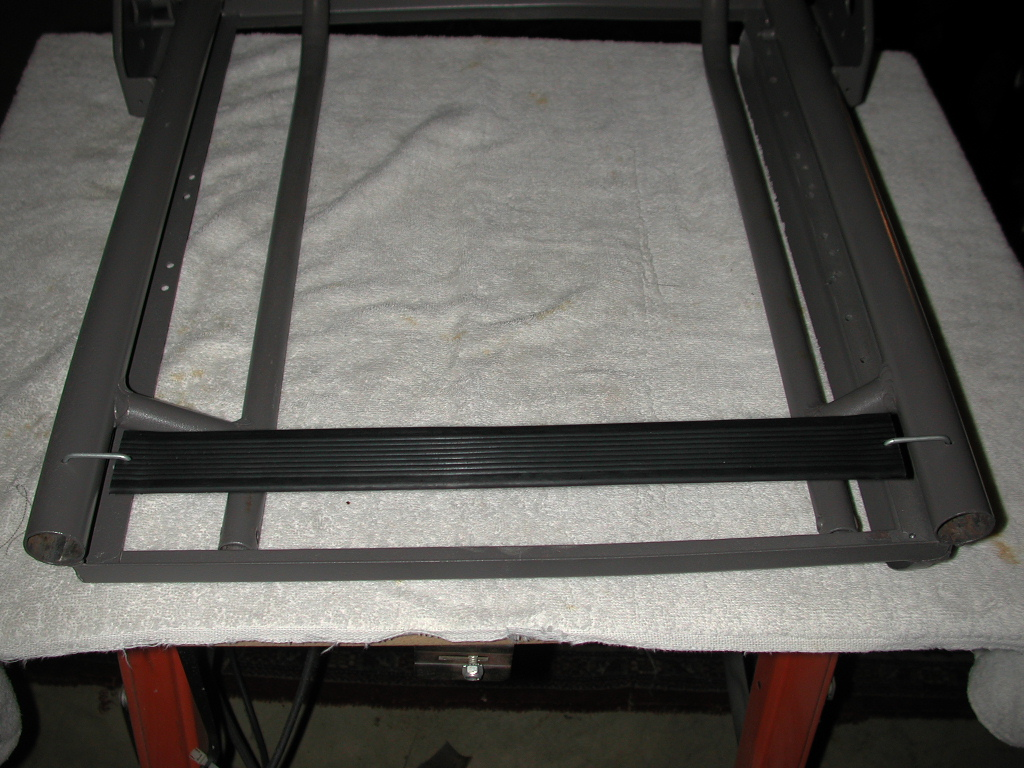
At this point you should have everything off of the frame and it’s time to clean them up and repaint. The easiest thing to do is to sandblast them. I personally prefer powder coating over paint which requires a bare metal surface so that’s what I did. I use the Eastwood system to powder coat everything I can and all of the seat parts were finished in this manner. Here are a couple shots of the completed frames: (The color is a little dark because I used powder I already had instead of buying something closer to original)


At this point it’s important to identify the type of seat that you have. There are basically 2 types that were used in the Tiger which I’ll call “early” and “late”. An easy, but unreliable method to determine which type you have is to look at the covers themselves. The early seats have 7 pleats on the seatbacks while the later type has 12. However, as we’ll see later in the article, it’s easy to mix and match the various seat types and cover styles. The early and late seat bottoms use entirely different cushion suspension techniques and are specific to the frames themselves. The early seats use a series of rubber straps and canvas to support the foam cushions, while the later seats use a rubber diaphragm which hooks directly to the frames. I had originally thought that my seats were the later type based on the fact that my car is a Mk1A and that I had found remnants of a diaphragm under the cushions, even though there were the homemade straps as previously discussed. Having these clues, I ordered the parts to do a later type seat only to find there was absolutely no way the diaphragm would fit on the frame. After talking with Rick at Sunbeam Specialties and Martha Wheat, I found that some early Mk1As like mine (B382000026) were fitted with the earlier type seats so I sent back the diaphragm kits and ordered the straps. The earlier seats also use a set of 4 canvas pieces to provide attachment points for the straps. Martha said that all of the foam cushions were the same for either seat type and that the later covers would work on the earlier frames. I like the look of the later covers so I opted to keep them.
The first step in reassembling the seat bottoms is to assemble all of the parts. Here’s a shot of the various pieces needed to get started:

Begin by threading the canvas pieces through the seat frame in the same manner as the ones which were removed, inserting 2 of the thinner straps into the pockets in the canvas. Using an awl, push through the canvas and the 2 metal strips to locate the corresponding holes in the seat frame. Once you are satisfied that everything is lined up, pop rivet in 4 places using 1/8” rivets. At this point the seats should look like this:

It’s now time to install the rubber straps. There are 6 straps in all, five short ones and a long one. Insert a seat hook in each end. Since my seats were missing the hooks I acquired a set from Martha Wheat. Here are some photos of the straps and hook detail in case you need to make your own:

The long strap attaches directly to the longitudinal tubes in the seat frame as shown here (canvas removed for clarity):
Next we’ll install the thick metal strips into the canvas supports. It’s important to position these strips properly to ensure equidistant placement of the straps. Begin by laying the strip over the pocket and marking where the end would be to position the first hole 5” from the rear of the canvas. Note: the distance to the first hole is different from each end of the strip. The longer gap goes toward the front of the seat. Here are a couple of good shots showing the installation of the strip:


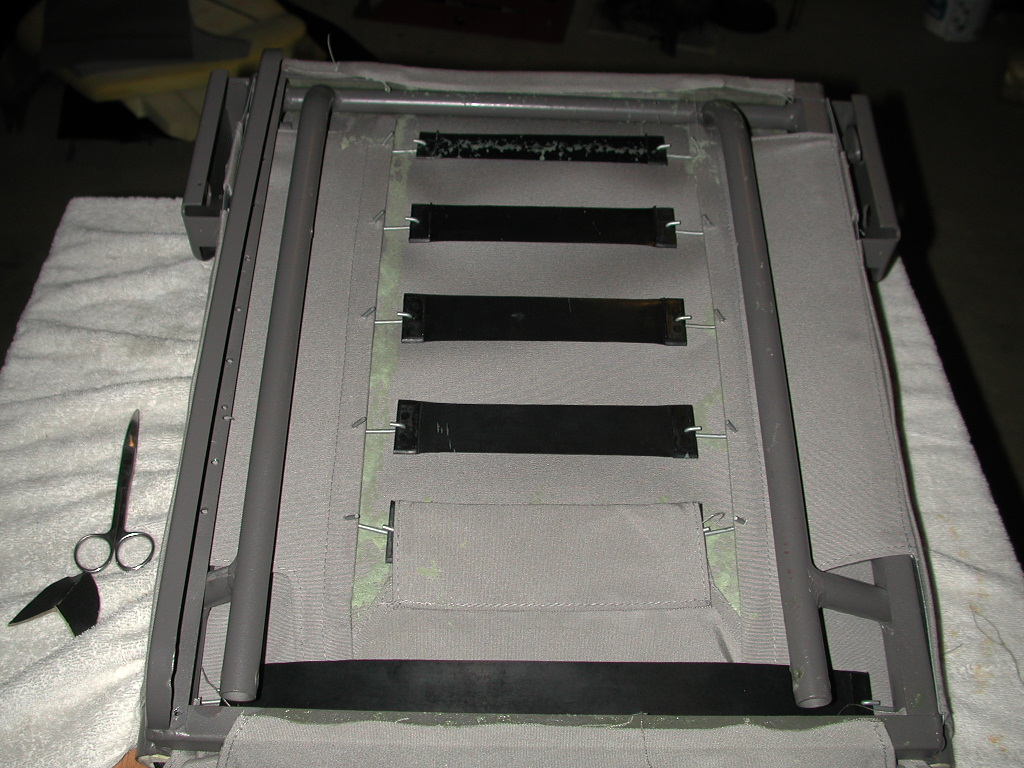
Once the strips are in place attach the 5 short straps with the smooth part of the straps on top. At this point your seat will look like this:

The seats have a very unique item used to support the front of the foam cushion. It’s actually made from bungee cord material and mine was beyond hope, so I had to make a new one. Here’s the process I used:
The first step is to recreate the wooden plugs which go in the longitudinal tubes. I used a 1” diameter dowel cut to the appropriate length (1.5”). Lightly sand and bevel the edges. Next drill a 13/32” hole through the dowel (you may need a larger hole depending on the bungee used). Here’s a shot of the dowels:

I cut the bungee cord to the appropriate length leaving one end untouched. I found that 16” between the dowels works fine and keeps it taught when inserted into the tubes. Slide the hook off of the free end. No sense in having to tie up both ends.

I used safety wire to tie up the free end. Double it over and then twist the wire to secure the loop. None of this is critical, but it’s better to err on the side of making the bungee too short than too long. Here’s a detail shot of the end:

Now you are ready to insert the dowels into the tubes. Make sure that the tubes are not dented or there is weld material on the inside or it’ll be difficult to drive the dowel in. I found that they fit snugly without any adhesive using a small hammer to push the dowels in. Here are a couple of shots showing the end detail and the finished bungee in place:


Once the bungee is in place the front flaps of the canvas supports can be wrapped around the bungee and secured. Martha suggests stapling them in place, but I couldn’t figure out how to get the stapler over the canvas. On the first set I sewed them together but glued them on the second. Either way seemed to work fine. Here’s a view of this step:
 The rear flap is glued in place as shown in this photo:
 Now’s a good time to talk about adhesives. Martha suggests contact cement. She uses a commercial product purchased in quantity but said that it’s the same as can be purchased at a local hardware store. I actually tried a couple of different things including a spray contact adhesive made by 3M and available at auto parts stores. There are 2 types of the 3M glue and the one I used was labeled Super Trim Adhesive with a part number of 08090. It’s supposed to be stronger and handle heat better than the one with 08080 part number. It worked reasonably well but I liked the control I had using the brush type contact adhesive. I used Weldwood contact cement and then also tried a new version of the same adhesive in a gel form. The gel type didn’t go as far but I felt like it penetrated better. The key with the Weldwood stuff is to stay away from the odorless, water-based versions and go for the full out nasty, volatile types. Just make sure you heed the warnings on the can. I used at least 2 coats, and normally 3, on each part to be joined. Wait about 20 minutes and join the 2 parts together. Firm pressure will set things quickly. Full strength is achieved in 24 hours.

The 3rd piece of canvas can now be installed. It has a pocket through which the 1st short rubber strap is inserted. Unhook the strap and feed it through the canvas. Center everything up and glue to the front to the frame wrapping it around the bungee as shown here:

Now for the final step in the seat cushion suspension procedure. Take the last piece of canvas which is rectangular with no sewn edges. Position it over the top of the straps and other canvas pieces and glue as shown here:
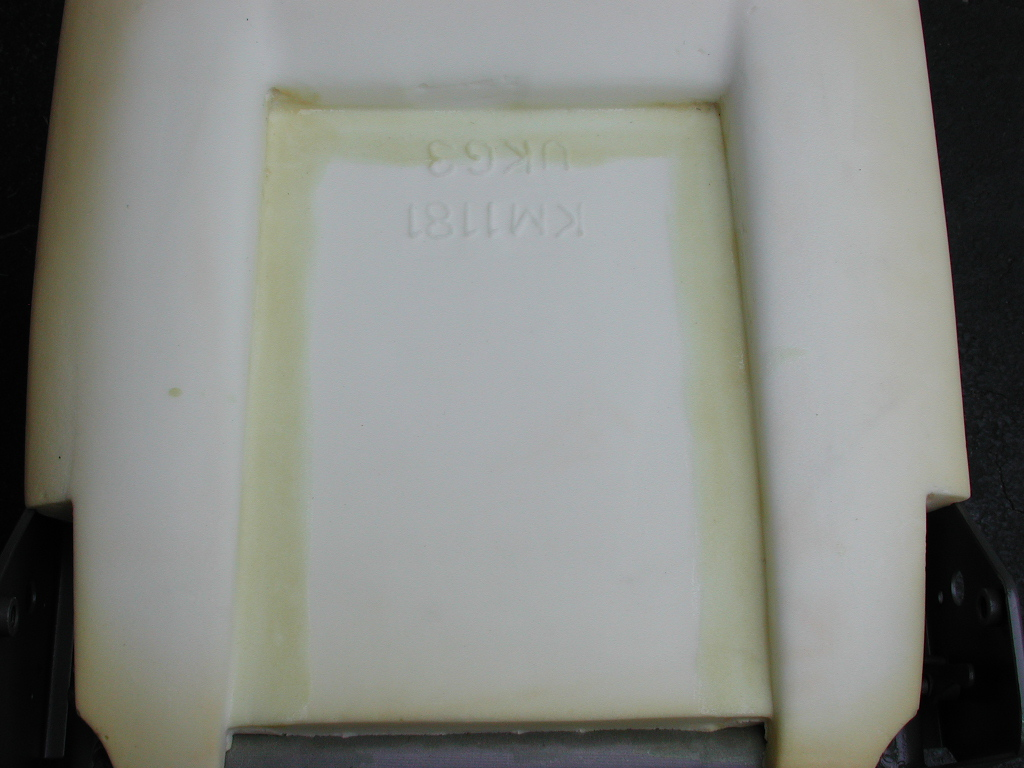
 The bottom will look like this after all the canvas is glued in place:
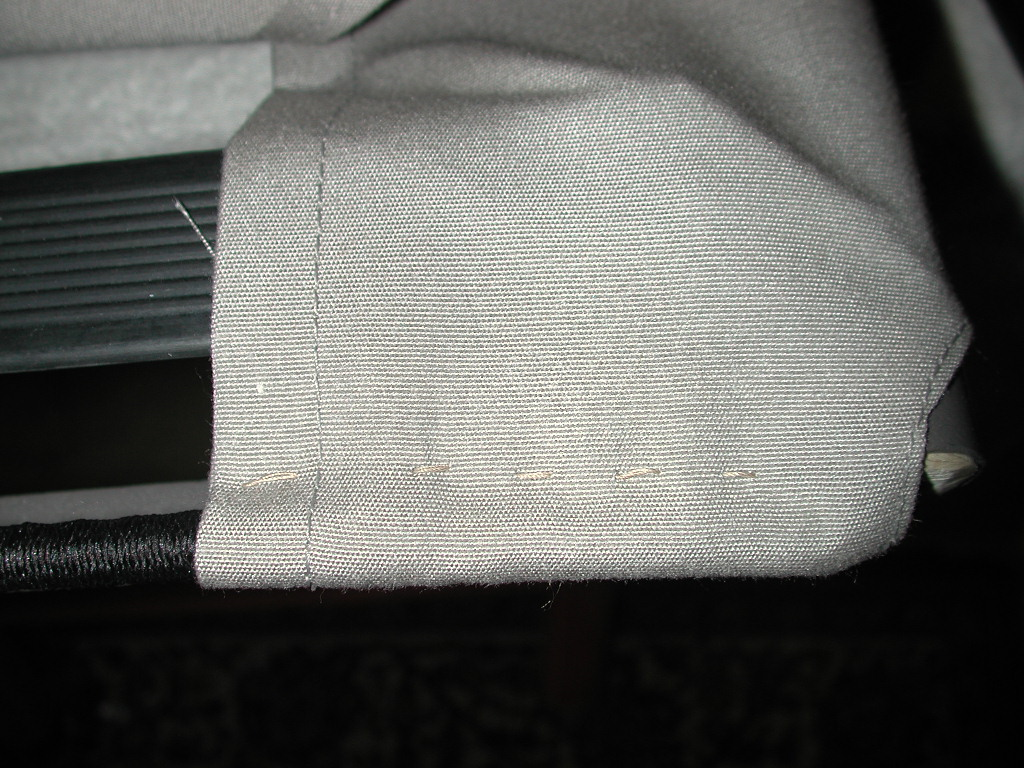
One tip that Martha suggested was to tuck a small piece of cardboard into the canvas on the front of the seat frame to protect the vinyl cover from the edge of the longitudinal tubes. Martha actually sent me these cardboard pieces which work fine but the outlines are noticeable through the vinyl cover. Here’s how it looks in place on one of the corners.

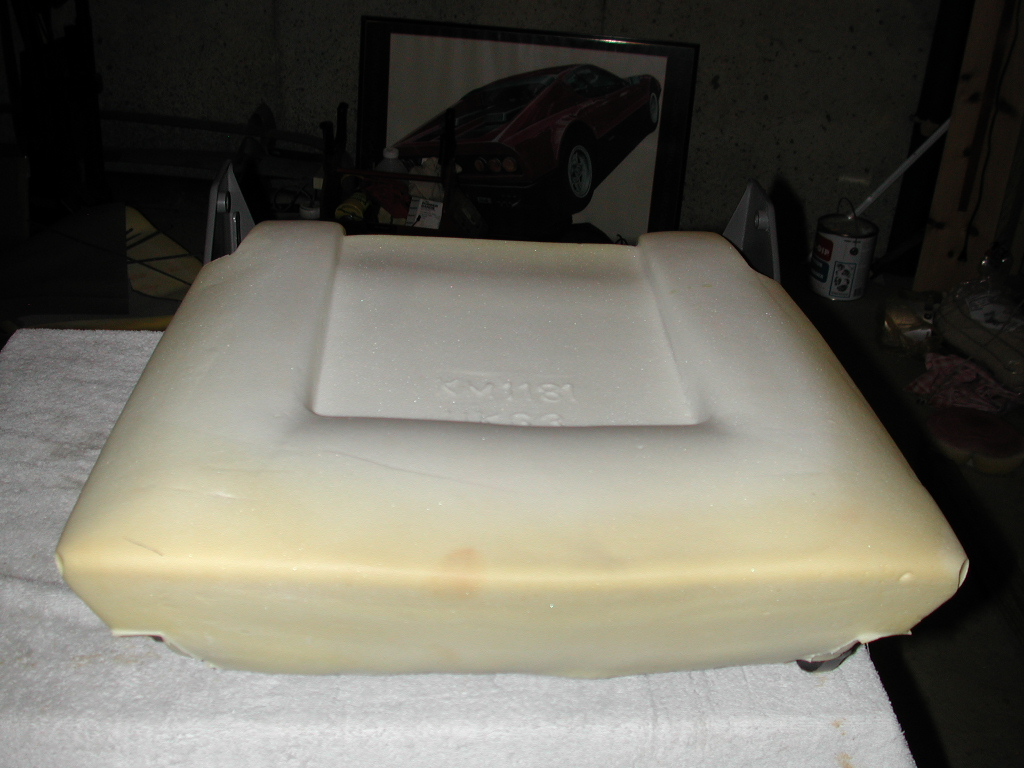
The cushion is glued down using contact cement. Use liberal amounts all over the canvas and the front and rear metal supports. It’ll look like this when you’re done.


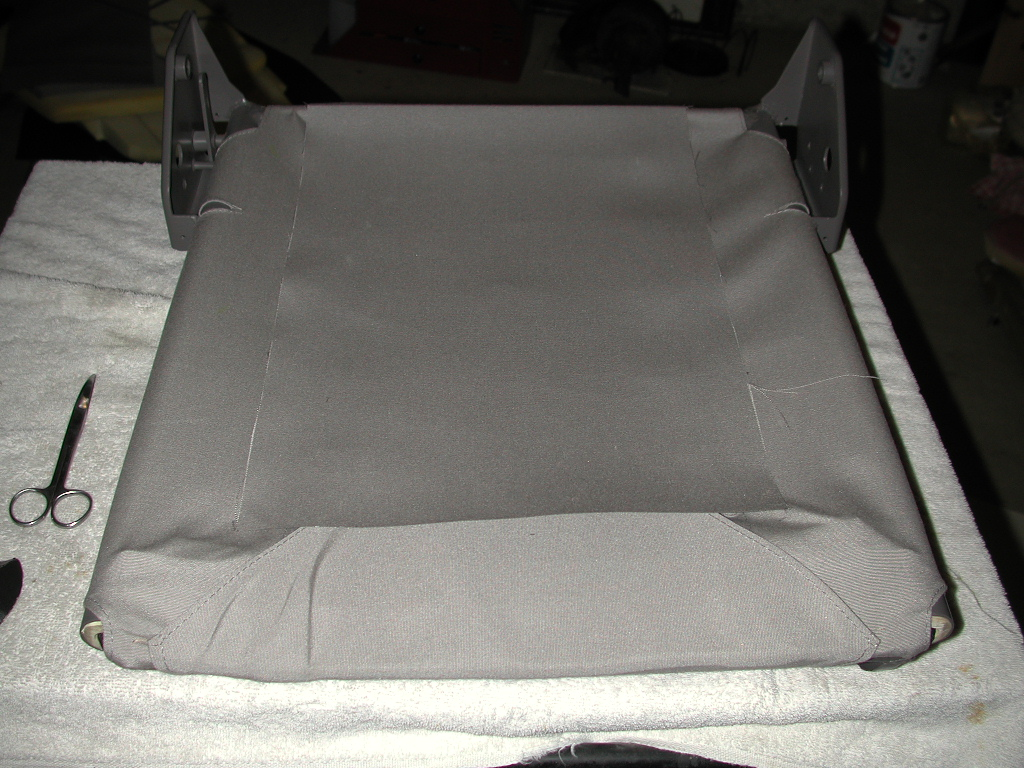
Now we’re finally ready to install the covers. The most important part of this procedure is where to apply the glue. It’s critical to glue the center of the seat cover to the foam. Only the first 1.5” of the perimeter needs glue as shown in these photos:
Once the glue has been applied to these parts, put it away as you won’t need it any longer on the seat bottoms. Position the center of the cover over the foam paying particular attention to line everything up. After I glued the center down, I waited until the next day before the next step to let the glue cure fully.
There are 24 clips used to secure the vinyl cover to the frame but hold on to them until the final stretching. A good tip is to put the seat bottom in the sun for a half hour or so to make the vinyl more pliable. A good tip I heard from a TE/AE member at this year’s United was to put the vinyl cover in the drier for a couple of minutes to soften it up. I went through a couple iterations of stretching and clipping the vinyl. I used medium sized binder clips which can be removed easily as you stretch the fabric. Here’s a shot of the binder clips:

Once you’re satisfied with the fit of the cover, tap the original clips on with a tack hammer and you’ll be half way there!


Seat Backs
The seat backs are quite a bit easier than the bottoms, at least for the later type which I have. The frames are the same, but the covers are different between the early and late seats.
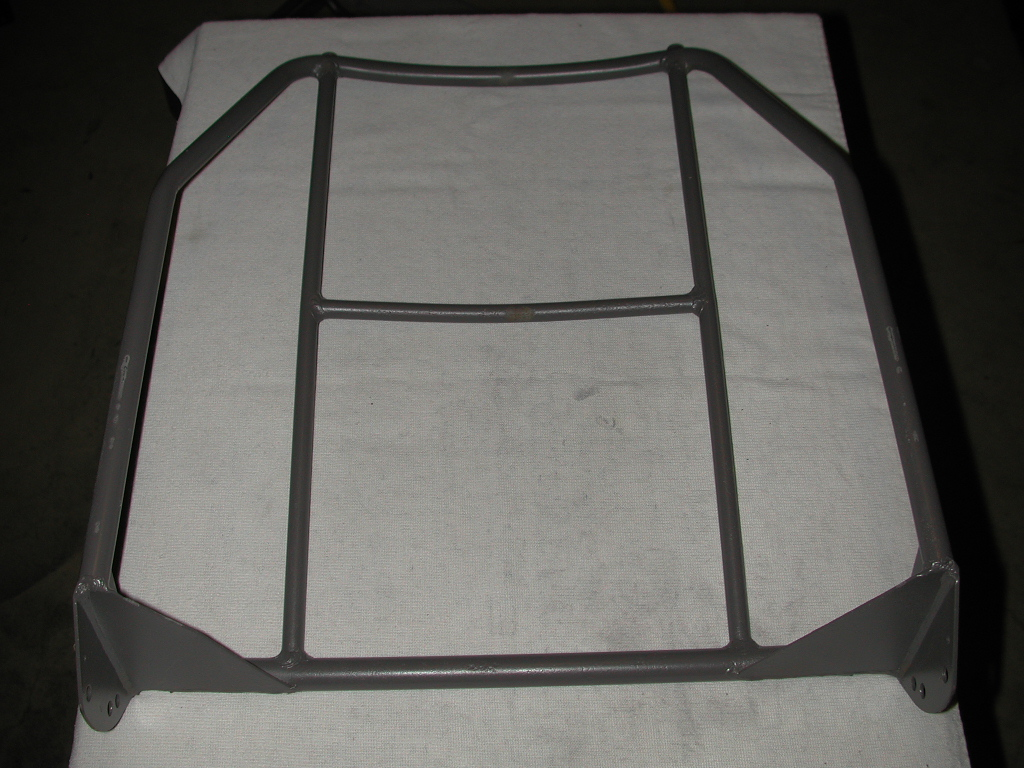
Once again I sandblasted and powder coated the frames as shown here:
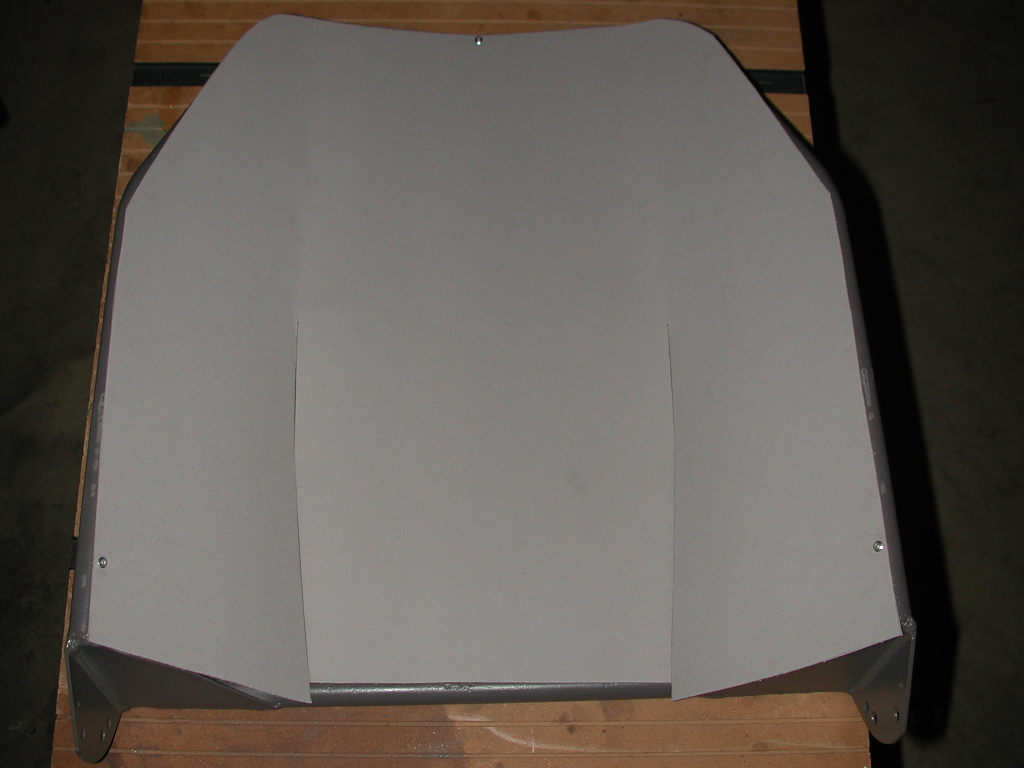
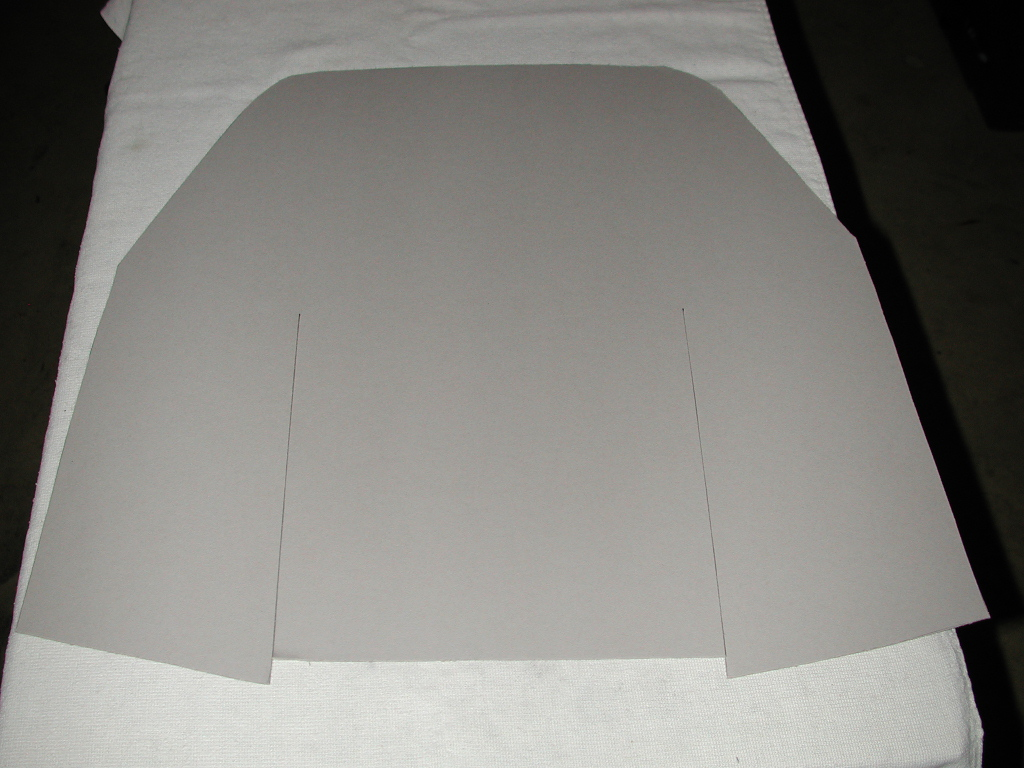
The seat backs have 2 pieces of cardboard attached to the frames. The back rear pieces were sent to me by Martha and were black on one side. Any art board or door board will work here. Install the cardboard around the frame and attach with 4 rivets, 2 on the top edge, and 1 on each lower side. You may want to trim the edges of the cardboard to conform to the shape of the frame.
Next install the inner cardboard piece using 3 rivets, 1 on the top, and 1 each on either side as shown here:
Now you can glue the foam down by liberally applying adhesive to both the foam and the cardboard. Nothing special here, just stick it down. Trim the cardboard as needed.

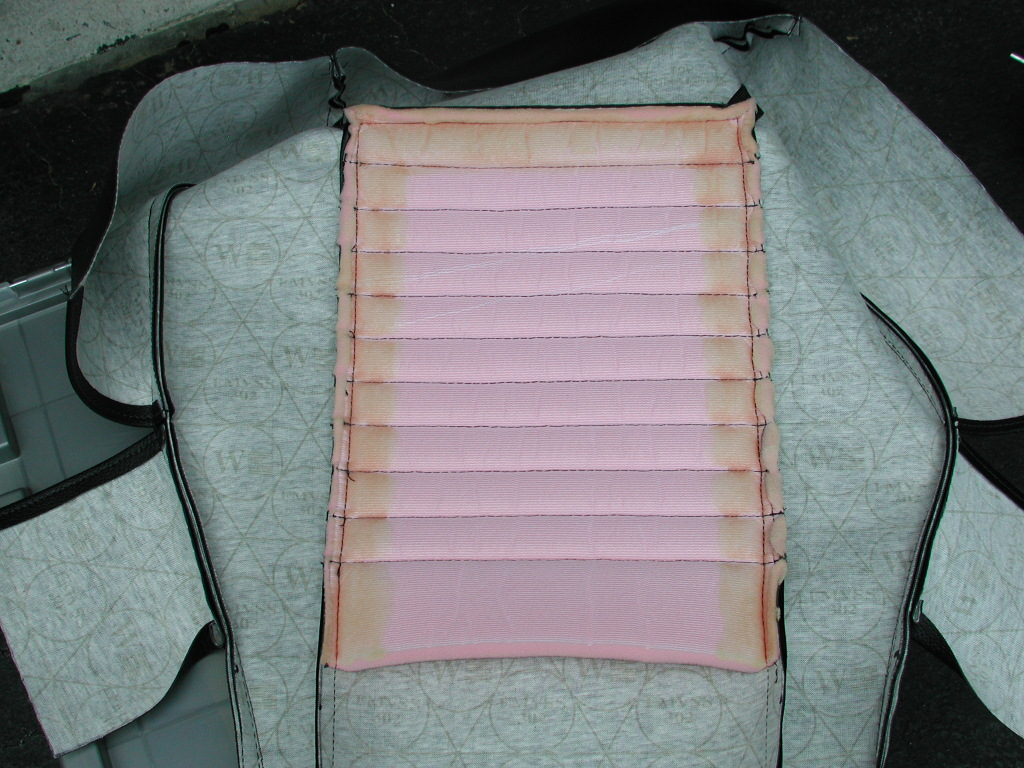
As we did on the seat bottoms, only the center section of the cover is glued down to the foam. Here’s a shot showing the adhesive location on each piece.


Here’s a trick for getting the vinyl over the foam in the next step. Us a dry cleaner bag, plastic wrap, etc. to provide a surface for the vinyl to slide on. After you’ve pulled the cover down and are satisfied with the alignment, reach up inside and pull out the plastic. This technique works very well.

Now we’re down to gluing the bottom loose pieces of vinyl to the frame. Start on the outside and pull around to the inside.

Next, pull the center section down and glue to the frame under the back cardboard piece as shown here:

Do the same with the end flaps:

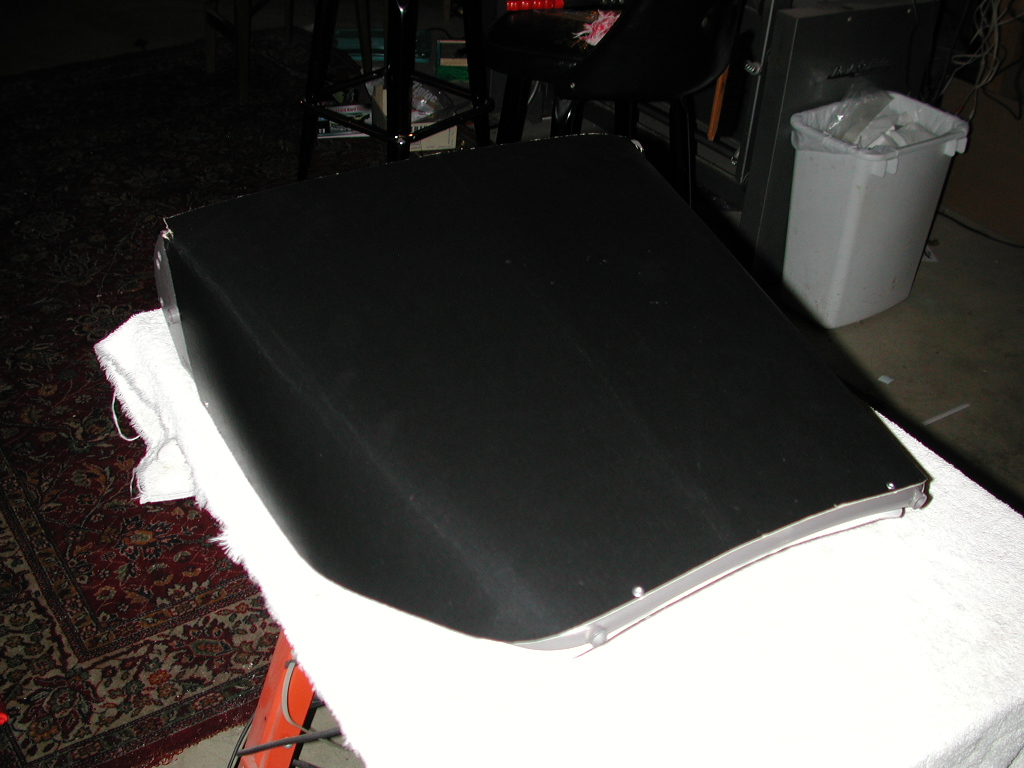
The final step in the gluing process is to wrap the vinyl from the back around the bottom of the cardboard and bond in place.
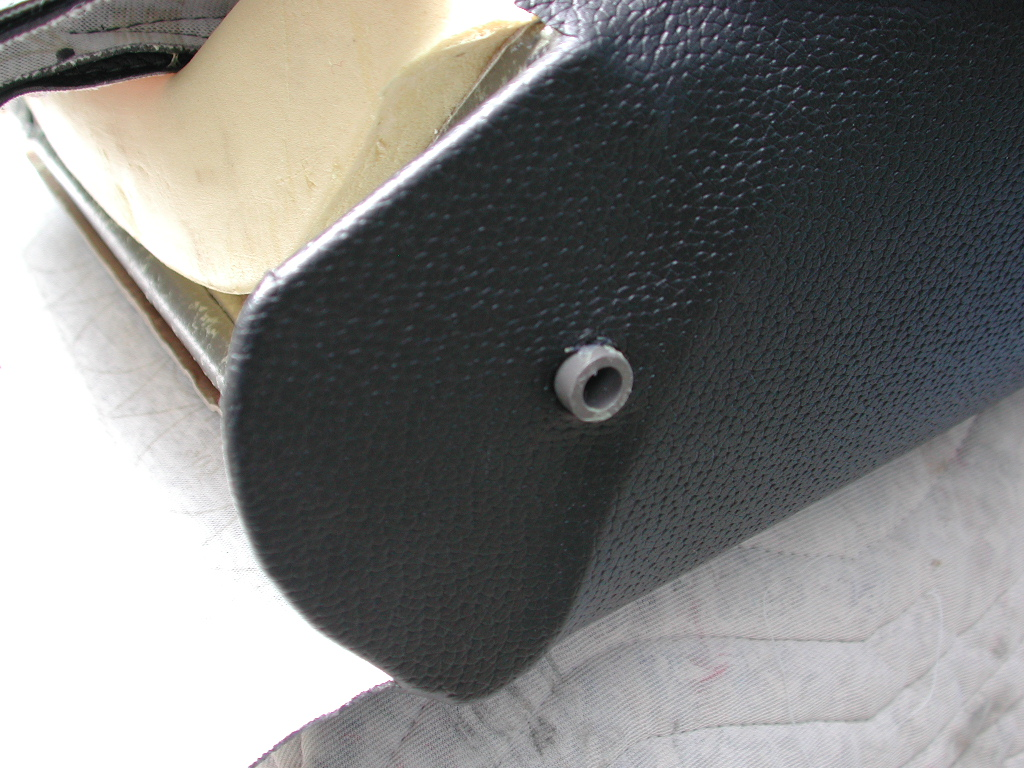
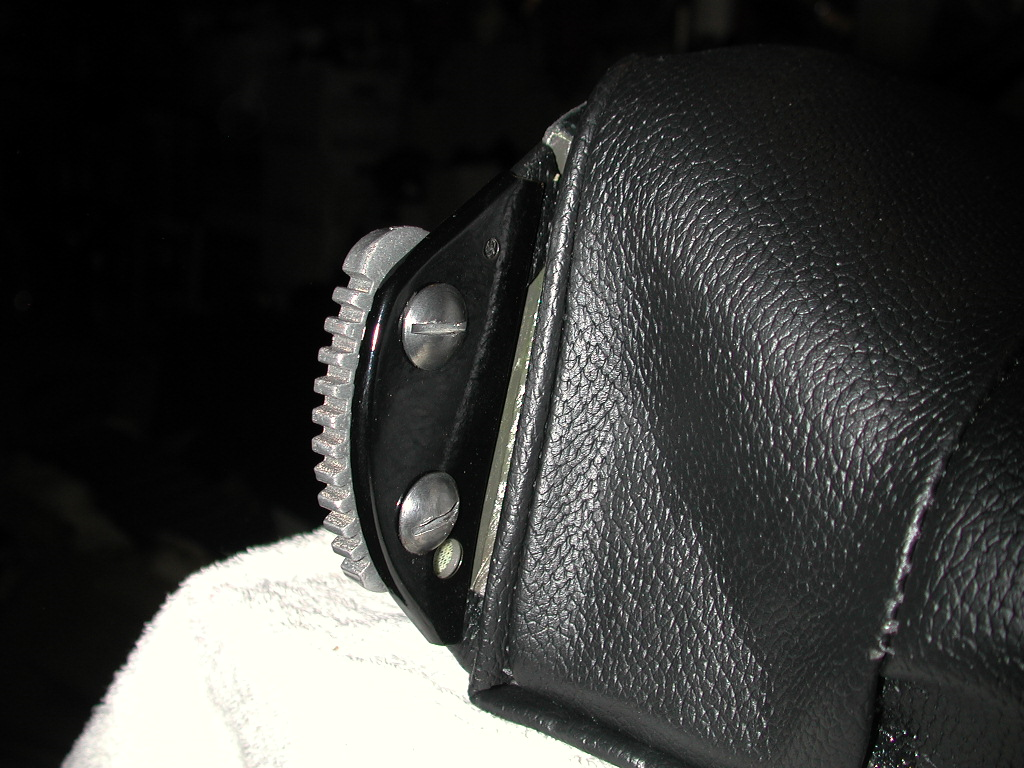
Install the trim screws through the bottom of the back piece into the frame at this time. You are now finished with the covering process and can reassemble the seats.
Reassembly
There are several pieces of hardware which are needed to complete the project. I cleaned everything up; powder coated what I could, and assembled them in this photo:

The only thing I replaced were the bolts which hold the seat sliding mechanism to the bottom frame as they are standard SAE hardware. Everything else is rather specialized and next to impossible to find. In fact, I learned at the United event also that the 2 long flat head screws are in fact Whitworth threads, the only non SAE fasteners on the car. That would explain why I couldn’t find anything to match them. Here are a series of shots showing how everything goes together. No magic here; as the manuals always say: “Reassembly is the reverse of disassembly”


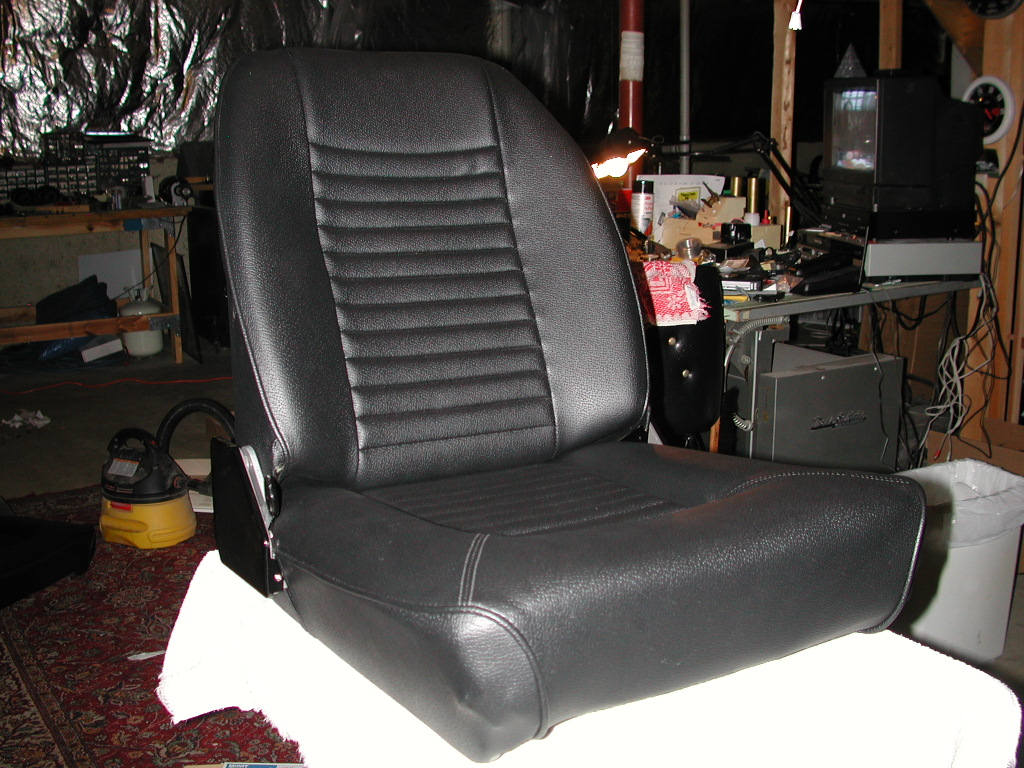
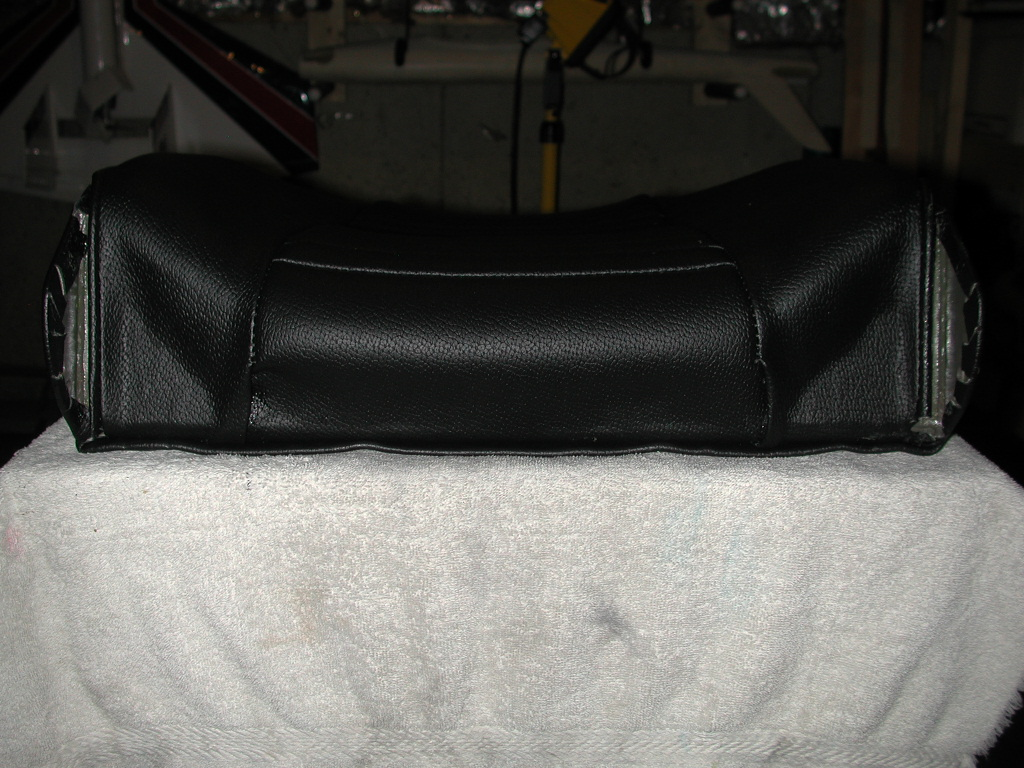
After
You’re Finished! Hopefully this has been a satisfying experience and has yielded a set of seats that look original and professionally done, and best of all you can say that you did it yourself.