
by John Thompson in the December 1978 RootesReview
Like so many cars whose production end opened the door to a classic automobile, the Sunbeam Alpine develops more and more interest each year. Unfortunately, like many classics, repair parts are becoming scarce and an engine rebuild can set you back 600 dollars. Tommy Stanbro, North Carolina Regional Representative was faced with this dilemma in the 1967 Alpine he had acquired. The car had a good body but a tired engine and transmission. Additionally, his wife had been bugging him about coming up with an Alpine with an Automatic so that she too could enjoy driving it.
Tommy was lucky enough to find a low mileage, wrecked Mercury Bobcat with the 2300cc four and an automatic transmission. This would be the ideal drive train choice for the Alpine. It was a Ford product and, after all, a Bobcat was sort of a mini Tiger.
With a little help from John Thomson (See June, 1978’s Newsletter on John’s Capri V-6/Alpine Swap.) Tommy transferred the old Sunbeam Alpine into a New Sunbeam “Bobcat”.
The swap is almost a “bolt in” conversion with no drastic changes required of the body, frame or steering. Also, the car can be converted back to the stock engine and transmission with little trouble and Tommy retained the old drive train so as not to destroy the classic value of the car. If you would like to try this swap, here are the steps.
The Engine
To place the Bobcat engine in the Alpine requires the following steps:
- Remove the cast iron exhaust manifold. A header exhaust must be fabricated to clear the steering arm.
- Remove the mechanical fuel pump, block the opening and install an electric fuel pump at the gas tank.
- Remove all pulleys, mounts for air conditioning, power steering and air pump. Retain only the alternator and fan pulleys.
- Remove the fan. The 2300cc engine is too long to use the fan. An electric fan purchased from the local Toyota dealer and mounted in front of the stock radiator will provide all the cooling needed.
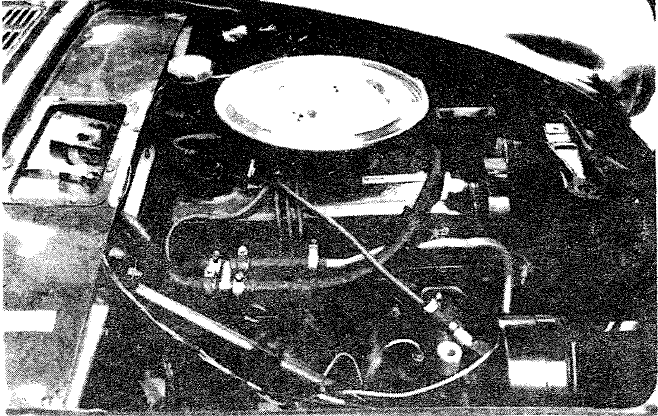
- The existing mounting plates on the front cross member are used to mount the engine to stock rubber Alpine engine shock pads. Approximately one inch is cut from the rear of the cross member to provide clearance for the oil pan. The engine is then lowered, complete with transmission, into the Alpine engine compartment.
- It was also necessary to reroute the water intake to the intake manifold and file down one corner of the alternator mount.
- Motor mounts were then prefabricated out of one quarter inch steel plate and the motor bolted into place. The stock electronic ignition was retained and all wiring hooked up.
The Transmission
Installing the automatic transmission involved the following:
- The transmission hump in the Alpine was cut around the base and approximately one inch was removed. The bottom of the hump was pulled out enough to clear the shift linkage and oil pan. The hump was then reformed at the base with sheet metal and pop rivets. The change is so slight that it still looks stock.
- A shifter from a Mustang was used and mounted in the same spot that the shifter for the four speed Alpine transmission went.
- The transmission mount is constructed of one quarter inch steel plate and bolts to the frame.
The Rear End
The stock 3.89 to 1 Alpine rear end was retained and to Tommy’s surprise the stock Alpine yoke slides right into the automatic transmission and the drive shaft is the right length with no cutting required.
 Tommy now has a modern engine and transmission in a sharp, fast sports car with classic lines and his wife, Vi, has a Sunbeam to drive when Tommy drives off in his red Tiger
Comments (1)
The comment: “The swap is almost a “bolt in” conversion……”
Nice conversion, But, indeed a tad bit more than a near bolt in.
A discussion about “finding” and engine and perhaps a tranny that can be installed without a “kit” pops up on occasion which leads to all sorts of exchange in ideas as to what will or will not work.
My ideas is regardless as to which way you go please complete your project insuch a fashion that you will be “Keep’em-on-the-Road”…… not a trrip to the scrap yard.