
From Straighten to Final Assembly
Part II
Part I is here
Article and Photos By John Logan & Doug Jennings
First published in Rootes Review, January 2005
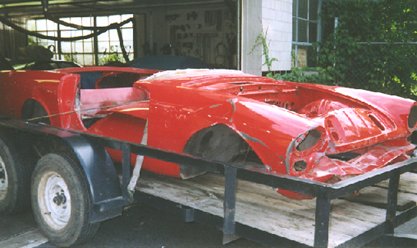 Last month we discussed how the Tiger was damaged, disassembled and dipped. This month we will discuss some of Doug’s methods of straightening and repairing body panels and surface preparation.
The Repair
The repair process starts with mounting the body in a cage specifically designed for the Sunbeam bodies. The cage is large enough to allow working clearance and will roll over to allow work on all areas of the body.

Key dimensions on the body are checked against standard Rootes factory dimensions. The underbody body rails are then straightened, stretched and aligned as necessary until they meet the standards.
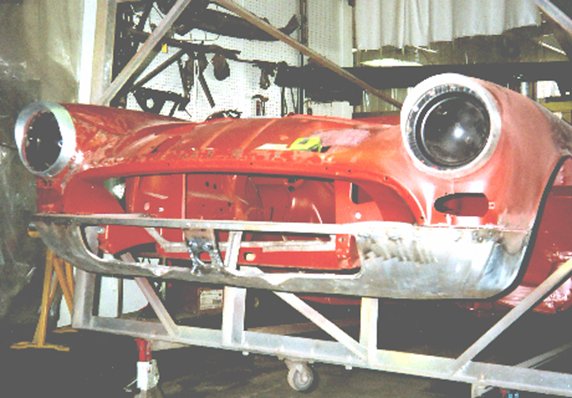
Next, the damaged panels are bumped out. This process requires years of Doug’s experience to know when to stretch, where to hammer, how to shrink or when an area needs to be cut out and replaced. The front fender is jacked forward and bumped out requiring the replacement of a small, complicated area where the fender joins the cowl.
One hard part to repair is the front lip of the grill opening. It has an inner reinforcement that does not allow access for straightening. First, the spot welds are drilled out so that the reinforcement can be separated from the lip. The lip and reinforcement are bumped and straightened individually and then fitted together and re-welded. The chrome surround is used to guide the final shape.
The original inner and outer panels of the hood are straightened somehow. Don’t ask me how; it must have been by magic. There are no indications of damage or rework.

The front and rear valance panels were both badly damaged. The top or flat area of the front is replaced with a reproduction panel and the curved lower part is bumped out. The rear valance panel is repaired with parts from Doug’s donor car stash.
Like most Sunbeams, especially V8 Tigers that experience extra stress, there are areas that require repair due to fatigue. To strengthen the body, Doug re-welds many seams, joints and spot-welds and adds reinforcements, especially around the rear spring attachment points.
Preparing for Paint

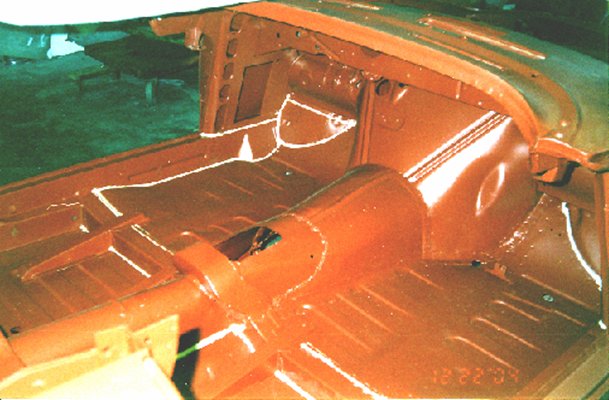
Before any paint is applied to the body, it is washed with soap and water, then with metal prep rust remover and allowed to dry. The seams are heated with a butane torch to make sure they are completely dry. At this point it is very important that all seams and surfaces are free of any dust or residue.
Primer Based on Color Selection
Since the final color of the car will be red, PPG’s DP-78 red epoxy primer is chosen. It is applied to both sides of the metal, heavy enough to seep into the welded seams of the body, doors, hood, trunk lid and inside the rails. All seams of the body are then caulked with a high quality sealer.
Surface Finishing
The body is now ready for the final bumping. Parts such as doors, hood, trunk lid, light rims and modesty panels are attached to the body as a guide and the metal is formed to fit them, making sure everything fits perfectly.
Finishing the Mudded Surface
When the metal has been worked as close as possible to the final shape, it gets another application of epoxy primer to cover the worked areas. Now the entire exterior surface is coated with an epoxy filler or “mud”. This material is used in lieu of a high fill primer. The mud is applied, filed, block sanded and refilled until all bumps and depressions are gone and the final surface contours are achieved. It is then given a coat of PPG’s K36 Acrylic Urethane primer, and block sanded in preparation for the final paint.
Comments (2)
I just purchased a tiger from original owner and decided to go through it completely. I’m planning on chemical strip( sending it out to be dipped) my ? Is what is recommended for the vin and jal plates. Leave them alone or remove. Also what is the best or recommended source for replacement info plate
Bear, Here is some advice from a senior TAC inspector…
The original rivets on VIN and JAL plates are preferred, but dipping will remove the printed text on the plates, leaving only the engraving. It would be better to remove them before dipping and replace with screws afterwards. Replacement data plates are available from Sunbeam Specialties. If the car has already had a TAC inspection the TAC sticker will not survive dipping. The car would have to be re certified. A picture notebook of the restoration, especially if any significant rust repair is needed. The TAC inspection is focused on the “unibody tub” bolt on components do not impact the outcome. Re-inspection if required is easier before the interior and the engine and transmission are installed, put require transporting the incomplete car to an inspection site.